
An Odyssey Through Time
Explore a captivating array of artworks, spanning
from 1940 to the present.

Success From the Start
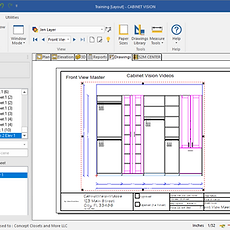
From setting up your first job to understanding the difference between cabinet and closet components, these videos walk you through foundational tools and workflows. Learn how to adjust system preferences, place doors, draw walls, use basic CAD tools, and save your favorite units for faster design. Whether you're new to the software or need a quick refresher, this channel sets you up for success from the very beginning.
• Add Units to Favorites Bar (0:58)
• Adding a Room to a Project (1:44)
• Adding and Placing Panels in a Room (6:31)
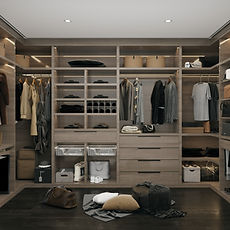
• Designing a Small Walk-In Closet (6:50)
• Door Placement (3:10)
• Drawing a Wall (2:25)
• Changing the Font Size (1:31)
• Changing the Mouse Scroll Direction (1:08)
• Creating and Restoring Backup Settings (3:08)
• Placing Obstructions and Using Shapes (17:20)
• Room and Job Properties (11:40)
• Tutorial on Designing (19:05)
• The Difference Between Cabinet and Closet Components (9:43)

Design to Impress
Learn to use the drawing tab, including how to customize title blocks, crop 3D renderings, remove doors for cleaner views, and manage scenes and pages. Whether you're preparing visuals for a client presentation or internal production documents, these videos show you how to maximize the drawing tab for clear, consistent, and impactful presentations.
• Creating a Custom Title Block (19:17)
• Cropping 3D Images for Drawing Tab (3:57)
• Removing Doors for Presentation (7:35)
• Removing Pages and Deleting Scenes (2:03)
• Tutorial on the Drawing Tab (20:36)
• Using the CAD Function in the Drawing Tab (2:41)
Pricing That Sells
These videos are dedicated to mastering the Bid Center in Cabinet Vision—your hub for pricing and reporting. Whether you need to set up pricing tiers, customize business reports, or filter rooms to ensure accurate job pricing, these videos will guide you through building a reliable, scalable pricing structure that helps you quote with confidence and clarity.
• Accessing Advanced Reports (0:28)
• Creating Simple Reports in the Bid Center (6:27)
• Filtering Rooms for the Bid Center (1:28)
• Generating a Cut List (1:44)
• Generating Pattern Cut Lists (2:23)
• Tutorial on Bid Center (7:33)
• Tutorial on the Reports Function (16:52)
• Understanding and Configuring Rate Tables (7:36)
• Using the Filter View (8:00)

Scene of the Design
This channel focuses on building the foundation of every project—your rooms. Learn how to add rooms to a project, design wall and ceiling types, place doors, windows, and obstructions, and work with different views for optimal layout clarity. Whether you're rotating a room, customizing job properties, or placing electrical elements, these videos guide you through creating accurate, well-structured environments for closets and cabinetry.
• Adding a Room to a Project (1:44)
• Adding Floors & Ceilings (2:50)
• Copy, Delete, & Reverse Room (5:13)
• Creating a Pitch Ceiling (4:28)
• Designing Different Types of Walls (9:31)
• Different Views - Top & Front (2:32)
• Door Placement (3:10)
• Room and Job Properties (11:40)
• Rotating a Room (1:25)
• Snap to Point (1:39)
• Placing Obstructions & Using Shapes (17:20)
• Placing Outlets in a Room (2:06)
• Placing Windows in a Room (2:00)
Unlocking Cabinet Vision
From basic configurations to advanced modifications, these videos will explain building, customizing, and managing individual units in Cabinet Vision. Learn how to add accessories, edit dimensions, apply lighting, adjust reveals, and work with panels, rails, drawers, and doors. Whether you're designing floating vanities, blind corner cabinets, or shelving units, these tutorials give you the tools to fully personalize your unit library for both closets and cabinetry.
• Add and Remove Backing from a Unit (5:19)
• Add Units to Favorites Bar (0:58)
• Adding Additional Valet Pins to a Column or Panel (2:52)
• Adding LED Strips to Canopy/Molding (2:11)
• Adding LED Strips to Panels (4:03)
• Adding and Placing Panels in a Room (6:31)
• Adding Price per Component and Calculations for Sizing (3:17)
• Adding a Rail to a Shaker Door and Changing the 1/4" Material of the Door (6:45)
• Adding Upper Cabinet and Notches for the Rails (brackets) for Pre-Coded Double Notch (3:25)
• Adding Valet Pins to a Column (1:59)
• Adjusting Dimensions on Units (3:12)
• Adjusting Handle Placement (9:04)
• Adjusting the Unit for Toe Pedestals (3:56)
• Creating and Saving a Custom Unit (3:28)
• Changing a Base Unit from Drawers to Doors (6:20)
• Changing Both Depths & Heights at Once (2:47)
• Changing Door Styles & Adding Rails, Mirrors, Glass, & False Panels (12:49)
• Changing the Number of Drawers in a Base Unit (1:22)
• Changing the Reveals on Individual Closet Units (4:32)
• Designing Blind Corner Cabinets (2:46)
• Designing Corner Units (14:31)
• Designing a Drawer Unit with Height Spacing Between the Drawers (7:03)
• Designing Fillers, Columns, and Fascia (6:21)
• Designing a Pantry (13:37)
• Designing Top Canopies/Molding (2:10)
• Equalizing the Width on Multiple Cabinets (2:00)
• Error Message - Overlapping Units (4:03)
• Fixing LED Dados Routes on Columns (3:25)
• Floating Vanity Cabinets (2:08)
• Locking Heights within a Unit (4:21)
• Modifying Blind Corner Cabinets (3:00)
• Placing Accessories into Your Design (1:26)
• Placement of Toe Kicks on Corner Units (4:58)
• Removing Toe Kicks on a Unit (1:14)
• Saving Units with Non-Visible Accessories (1:58)
• Selecting and Deleting More than One Unit at Once (0:29)
• Selecting and Moving Multiple Units at Once (2:38)
• Snap to Point (1:39)
• Tutorial on Columns (7:23)
• Tutorial on Designing (19:05)
• Tutorial on Hanging Units (21:12)
• Tutorial on Shelving Units (24:06)
• Updating a Room after Changing Finishes (1:25)

Engineered as Designed
These videos help prepare your Cabinet Vision designs for accurate output to CNC and production. Learn how to adjust cut-to-fit components, correct pre-mill sizes, filter rooms for material optimization, and recut parts as needed, so data flows correctly to S2M. Ideal for streamlining your transition from design to fabrication with minimal errors and maximum efficiency.
• Add 1” on the CTF -Connecting Top/Bottom Shelf for Cut to Fit Components (3:34)
• Creating Notches in Panels for Obstructions (5:15)
• Correcting Pre-Mil Sizes on Parts (2:07)
• Filtering the Rooms for Sheet Count in S2M (1:44)
• Generating a Cut List (1:44)
• Generating Pattern Cut Lists (2:23)
• Re-Cutting Parts for the CNC (1:34)
• Tutorial on the Reports Function (16:52)
• Updating a Room (1:25)

Master of Materials
Whether creating detailed material schedules and assigning pricing by component or adjusting backing thickness, toe pedestals, and textures, these videos walk you through customizing the database and job settings to ensure your designs price, render, and process accurately. Learn to manage materials, set up door and drawer configurations, build part kits, and more.
• Adding Material and Price (5:22)
• Adding Price per Component and Calculations for Sizing (3:17)
• Adding Pricing for Glass (4:01)
• Adding Pricing for Mirrors (1:15)
• Adding Texture to the Material Renderings (6:11)
• Adjusting the Unit for Toe Pedestals (3:56)
• Adjusting Handle Placement (9:04)
• Applying Split Backing (5:17)
• Changing the Backing Thickness (3:24)
• Changing the CV Catalog (2:58)
• Correcting Pre-Mill Sizes on Parts (2:07)
• Creating Door Material Schedules with Multiple Finishes (11:29)
• Creating Drawer Box Material Schedules with Single and Multi-Finish Options (11:49)
• Creating Material Schedules for Cabinet Assemblies with Multi-Finish Applications (13:34)
• Creating and Managing Layer Schedules (24:20)
• Creating and Restoring Backup Settings (3:08)
• Creating and Using Part Kits (5:30)
• Customizing Job-level Preferences (4:17)
• The Difference Between Cabinet and Closet Components (9:43)
• Door and Drawer Face Material Schedules - Profiles & Finishes (4:48)
• Entering Company Information (1:35)
• Navigating System-Level Preferences (4:28)
• Uploading Texture Images (Floors, Walls, Material) (4:44)

Help the Software Help You
This channel focuses on using the CAD tools in Cabinet Vision to enhance design accuracy and presentation clarity. Learn how to add, move, and delete text boxes, draw lines and shapes, apply dimensions and leaders, and rotate rooms for optimal layout orientation. These videos provide quick, practical guidance for making precise adjustments and annotations within your drawings and project files.
• Add, Move, & Delete Text Boxes in Drawings (2:05)
• Rotating a Room (1:25)
• Using Lines and Shapes in the CAD Function (5:25)
• Using Dimensions and Leaders in the CAD Function (6:16)
• Using the CAD Function in the Drawing Tab (2:41)
Don't see what you're looking for? Let us know, we take requests!